Friday, July 29, 2011

Freezer Paper Stencils

I love this!
You need: 
freezer paper
fabric glue
a cool little knife
t-shirt
iron

First things first, prewash the t-shirt without fabric softener.

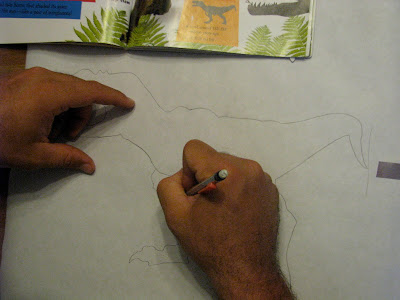
Step 1 is to draw the design you want onto the dull side of the freezer paper. (No, I do not have man hands, that is my husband, I cannot draw an Allosaurus, he can)
For Max's I did the shape of Texas. I just traced it out of an atlas. Worked really well.

Step 2 is to cut the figure out with a blade, just remember you will need the negative part of this, not the inside.


Step 3 is to iron your stencil onto the shirt. Make sure the shiny side is on the t-shirt.
Step 4 is to take your paint, I used tulip brand
I didn't mean to buy the puffy kind on the white but it actually turned out kind of neat.
I squeezed the paint into a cupcake cup and painted it on with a brush.
Don't forget to put a piece of cardboard inside the shirt so that the paint doesn't go through.
The white did need a lot more coats.
Next you wait until the paint is dry. The paint bottle said 4 hours but I say 'poppycock'. An hour was plenty of time, you could even speed the process up with a hair dryer.
Step 5: Once it's dry you peel the freezer paper off...

Step 5 is very important. Put a cloth on top of what you painted and iron for about 15 seconds. This seals the paint, otherwise it will come off in the wash.


There are other instructions on the paint bottle that say to wait 72 hours before washing the garment and to wash it inside out. But our clothes usually sit in the hamper way longer than that :)

Since the Texas was painted on with puffy paint, the it came out raised. That may be kind of obvious but I wasn't sure what it would do since it was painted on. I think it looks pretty cool.

And the finished product...
Will is so excited about his Allosaurus that he thinks it's going to scare people when he wears it. Max didn't notice there was anything on his shirt.

I have also seen this done on baby onesies, pillow slipcovers for throw pillows, tote bags, pillow cases for a bed, even curtains and duvet covers. Lots of fun!
Thursday, July 28, 2011

Chicken Something Pasta

I found a recipe on Pinterest for Chicken Bacon Ranch Pasta. I was disappointed because there is nothing 'ranch' about it. I also changed it because I didn't want to cook any bacon... But the outcome did turn out pretty good. 

Ingredients needed are... 
chicken breasts
penne pasta
1 tsp garlic powder
1/2 c heavy cream
1/4 c cream cheese
1/4 c shredded parmesan cheese
2 eggs
1/4 tsp black pepper


The first thing I did was bake the chicken breasts, I always use olive oil on the chicken, makes it nice and tender. While that was baking I boiled the penne pasta.

To make the sauce...
1. heat the cream cheese (it will work a lot better if it's room temperature) and heavy cream on low. Whisk until smooth

2. Remove from heat and add parmesan cheese, eggs, garlic powder, pepper and whisk until blended. 

3. Add sauce to the pasta

4. Add the chicken

5. Serve with a salad... and delicious!

and here's my sweet helper!


Tuesday, July 19, 2011

Before and Afters

I have been redoing some stuff around the house and wanted to share.

The story of the tuffet...

 I bought it 5 years ago when I was working at Tuesday Morning, it came off the truck without a tag and there wasn't another one like it so my sweet manager damaged it out for me for $6! We had just got married and I had an apartment to decorate, I loved it. It used to have fringe around the bottom and some pretty trim around the top but over the years of little boys it all got torn off. It also has some awesome stains on top from a sweet husband using it as a dining table on his lunch break. I could never part with it. So I made a slip cover...
 Now I realize this slipcover is far from perfect but the longer it's used the less ghetto it looks. I also love that I can just take it off and wash it if life ever happens to it, and it will.

The story of the china cabinet...

When we moved into our house I was looking for a hutch to keep some extra dishes and my in-laws (the best ever) gave me this china cabinet! It was part of the dining room set they bought when they first got married... not too long ago my mother in law looked at me and said "Biz, you can paint that" and the next day I went and bought paint :)
 Now it does have doors on top but it's taking me forever to finish painting them so for now the top is doorless, but I think it still looks good, I love the color of the inside.

The story of the lamp...

It has an ugly shade, bought it "as is" at Pier One, the harp was broken. I bought a new harp and recovered the shade with some awesome fabric!

And the bookshelf...


It was boring, I arranged the books by color but it still needed something else, I painted the back of it with some purple paint left over from the kitchen.

 I also moved my dining room to the front room. It was an awkward room because there was no light and it was pretty stuffy. Jade installed a ceiling fan and we moved the dining room and piano and it opened up the house SO much more! Love it!


Friday, July 15, 2011

I will first apologize for not having any pictures for this post, I hate blogs without pictures. I just wanted to share my suprisingly good supper I cooked up last night. 

We are currently pinching pennies (hard) and I am trying to wait to buy groceries until we have eaten everything in the house. I did this in college and ate a lot of random things, like salad for breakfast... I won't do that to my family though, it was gross.

I was hungry for the chicken and black bean enchilada bake and didn't have all the ingredients so I scrounged up what I had...

2 frozen chicken breasts
white rice
black beans
mexican blend shredded cheese

1. I thawed out the chicken and baked it at 350 for 30 minutes (I pour olive oil all over the chicken before I bake it, makes it real juicy) then cut it up into chunks

2. cooked 3 cups of white rice

3. cooked the can of black beans

4. get a bowl and pile in rice, beans, chicken and then cheese on top

Stinking Delicious! Even the 4 year old pickiest eater ever, ate it all without a peep.

We actually had a lot of chicken left over so that will be added to romain lettuce tonight for some chicken caesar salad, so excited!

It's bothering me too much to not have any pictures so I'll add some of our newest family member.
Meet Bruno Francisco el Fantastico


Tuesday, July 12, 2011

Lemon Cream Cheese Bars

I am not a lemon person but I will try anything with cream cheese. I found this recipe on Pinterest and is originally from Recipetips.com They were fairly easy to make, I didn't get any pics of the process but I did take a nice picture of the lemons I bought in my pretty silver bowl :) 

Ingredients are 
1 box of lemon cake
1/3 c butter
1 egg
8 oz cream cheese, softened
1 c powdered sugar
1/2 lemon-grated
2 tbsp lemon juice or 1/2 fresh squeezed lemon
2 eggs
1 tsp vanilla

Preheat oven to 350
1. Mix dry cake mix, butter, and 1 egg.
2. Press into a 9 x 13 ungreased pan
3.Beat the cream cheese until smooth.
4. Gradually blend in the powdered sugar.
5. Stir in lemon peel and lemon juice until smooth.
Save 1/2 cup of this mixture and refrigerate it for later use.
6. Beat the remaining 2 eggs, add the vanilla, and then beat this mixture into the remaining cream cheese mixture until well blended.
7. Spread over the cake mixture.
Bake about 25 to 30 minutes.
Cool completely.
Spread the saved cream cheese mixture onto the bars.
Stick in the refrigerator until cool (I hate this part, takes too long)
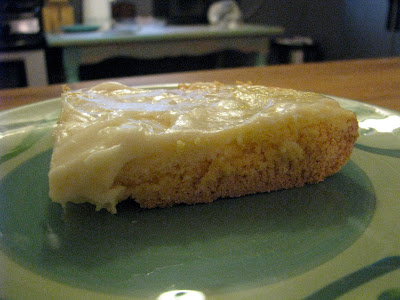
Sad picture, I didn't have good light and I'm not even going to pretend I'm a photographer

The mixture of cream cheese, powdered sugar, lemon juice and peel was definitely the best part of this dessert. I wasn't crazy about the crust but other people that ate it liked it. 

I think I am going to make some sugar cookies and use the cream cheese/lemon mixture as icing. That should be awesome.

Monday, July 11, 2011

Mexican Speciale'

Just for the record, this dish was named by my husband :) 

Ok! I found the recipe for something similar to this on Pinterest and tweaked it a little bit. The original recipe was Campbells Beef Taco Skillet. It calls for 1lb ground beef, 1 can of tomato soup, 1/2 c of salsa,  1/2 c of water, 6 tortillas and cheddar cheese.
This is what I did...
1 lb lean ground beef
1 can enchilada sauce (I chose red, you could use either)
1/2 c salsa (but only because Jade put it in there against my will)
1/2 c water
6 tortillas
1/2 c sour cream
mexican blend cheese

1. First thing I browned the ground beef and drain the grease

While the beef is browning tear the tortillas into small little strips, about 1-2 inches

2. Stir in the water, enchilada sauce and tortilla strips until it gets hot and starts bubbling. 

3. Stir in the sour cream and salsa and then top with cheese

and YUM!


The best thing about this meal was that it was SO fast to make, especially if the ground beef is already thawed out. It was ready to eat within 10 minutes of when I started making it.


Friday, July 8, 2011

Photo Contest

I just found out that Max is in a photo contest for the Big Spring Herald. Follow the link and vote for him!!! He's definitely the cutest one on there!


GO MAX!

Tuesday, July 5, 2011

Sopapilla Cheesecake

Best Most Addicting Stuff Ever!

I made this on Saturday at my in-laws for the first time and then had to make it on Monday for the 4th. What makes it even better is that it's SO easy.
2 cans of crescent rolls
16 ounces of cream cheese (next time I will get the low fat and pretend like it's healthy)
2 cups of sugar
1/2 cup of butter
1 and 1/2 teaspoon of vanilla
cinnamon to taste


1. Put 1 can of crescent rolls into a pan, the big rectangle size one (technical huh?)
make sure you spray the pan first
I forgot to start taking pictures until I had passed step 1, ignore the glob of goodness
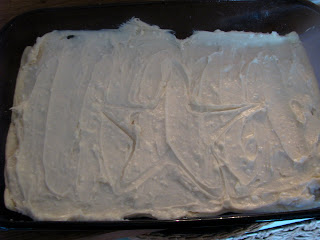
2. Mix the cream cheese, 1 c sugar and vanilla. Get a clean spoon and eat a good spoonful of it and then put that spoon in the sink. Get a clean spatula and smear the gooey goodness on top of the crescent roll
The star is not necessary, but it was the 4th of July, I think it made it taste a little better
3. Roll out the 2nd crescent roll on top
4. Melt the 1/2 c of butter and then stir in 1 c of sugar. and poor that on top. Sprinkle cinnamon to taste.
Cook at 350 for 30 minutes and it will come out looking like this... 
I know...!

What's even better is when you cut into it, it looks like this...