Saturday, December 15, 2012

DIY PJ Pants


I have been wanting to make the boys some pajama pants for a while out of some tacky kid fabric that I would never pick out myself and let them pick out. However for a fun stocking stuffer I let them pick out some fabric and made pillowcases.
I had a ton of plaid flannel fabric left over from stockings that I made a couple years ago so I opted for that to make the pants with instead of buying more fabric.
I semi-used this tutorial that I found on Pinterest...
pajama-pants-tutorial.jpg

It is a very helpful tutorial but I was in a lazy mood and thought I could figure it out once I got started. I kind of did :) 
I was also too lazy to drive to the store to buy elastic so I made them drawstring.

My intention was for these to be their "Christmas PJ's" instead of paying money for actual Christmas PJ's that they can only wear for a couple weeks because then it's not Christmas any more. I like to think of myself as a reasonable shopper and cute PJ's are way too expensive for something that 95% of the time they are going to wear when they're home and in bed.
When I mentioned to the boys that these are their Christmas PJ's they wanted to know why there are no snowflakes, snowmen or Santa Claus on them...
So depending on how hard they push the issue I may have to go buy some Christmas-y iron on patches to Christmas them up!
While making these I realized I am getting ready to have a girl because it was all I could do not to put ruffles on them somewhere! :)

Monday, December 3, 2012

I am thrilled to say that I can finally work on my blog from the comfort of my IPad while sitting on my butt! I'm pretty pumped!
As you probably already know I am expecting a baby girl in April! We are so excited and I am consumed with planning the nursery, super cute outfits and wanting everything to be absolutely perfect.
With that said, my job that I love is a little extra stressful this year and would suck every ounce of energy out of me whether I was pregnant or not. BUT I have some fun projects that I want to share so I am going to do my bestest to keep this baby updated. If I don't, I need you to bug me about it!
I'm adding a couple of pictures from some of my inspirations...

Just FYI this is the first post from my IPad on this app so I have no idea how its going to publish!


Monday, July 16, 2012

Fabric Covered Letter

Ok here is the tutorial for the fabulous door hanger...
The H I found is from Hobby Lobby, they have different sizes and styles of letters.
The fantastic fabric was a fat quarter I picked up and stashed for something fun :)
I traced the letter onto the backside of the fabric.
Cut the letter out as close as you can to the line. 
I used some homemade mod podge, brushed the mod podge onto the letter and very carefully place the fabric onto the letter.
Tip 1: You have to rub the fabric for as long as it takes the glue to dry or else it will bubble up at the last second. 
Tip 2: On most mod podge projects, you put the glue down before you put the whatever on and then brush glue on top of whatever you glued down... don't do that with this project, the fabric will peel off the letter VERY easily and is a lot more likely to bubble.
I used a razor blade to cut off any excess fabric that was hanging over.
I used a scrap piece of burlap for the hanger, just hot glued it onto the back of the letter.
Tied the bow with black burlap and hot glued it onto the middle of the 'hanger burlap'

and Taa Daa! I love it!

Saturday, July 14, 2012

New Touches

Just a few little changes in mi casa...
I have had the same Southern Living flower bucket hanging on my front door forever, I never even had any flowers in it. I can't make myself spend that much money on fake flowers. The ones that look good are expensive, even though they last forever, I just can't do it.
I am in love with my new H :) I will probably do another post on how I made it, it was very difficult and complicated, don't try it, you should just pay me to make you one.
Just kidding, it's SO easy, you'll see!
I also have to give credit to my homegirl April Conway for telling me to put the bow on top. It totally made it 100% cuter!

Next is my heart on a stick... my mom made this awesome heart with wings (along with a lot of other things) for my wedding reception. I have hung onto it for the obvious reason of... it's awesome!
It looked like of naked hanging on the dining room wall by itself. While I was in the alley a couple weeks ago I found this beautiful limb, perfect for nailing to the wall, right? (Isn't that what everyone thinks when they find a stick laying in an alley? No?)
The heart is actually hanging from a little piece of the stick so it kind of swings back and forth a tiny bit with the air from the ceiling fan. I love it!

This is the most random thing, I know, but I love it. An old bottle, I have no idea where it came from, I have a stash of things like this in my hall closet. 
When I was making the H for the door I had a perfect little strip of fabric left over that I thought needed to be tied onto something for an extra touch. I ended up hot gluing it onto the bottle.
The bottle is just sitting on the tray I put our keys on by the front door.
Makes me happy :)

Thursday, July 12, 2012

New Living Room Art!


Yay! I have had my eye on this project for a long time and finally got to do it! 
The beautiful thing about being a teacher is getting summers off, don't let anyone ever complain about that! Yes we still have to go to staff development and work in our rooms to get ready for the next year but you still have a beautiful amount of time to work on projects, oh yeah, and hang out with your children :)
I saw this on Pinterest, I think I actually think it's one of the first things I ever pinned, aww.
I fell in love with the look and the words, they are actually the lyrics to an Ingrid Michaelson song. (I may or may not have spelled her name wrong, sorry Ingrid)
The link to the original project is here. Me Oh My... It's a super fun blog with lots of cute stuff, I highly recommend browsing through it!

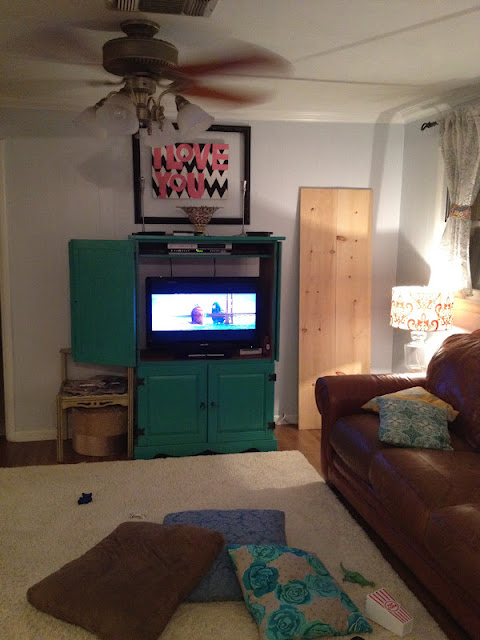
So I had this awkward spot in my living room and wasn't sure what to put there and then it came to me... a big plank of wood with something cute painted on it...
There's my plank of wood... It took forever for me to actually stain it, and of course I took pictures because it was the first thing I ever stained, and I think I did a pretty good job
I don't remember the brand but I do remember the color was ebony. It actually stayed in my living room just stained for a long time, I think it looks pretty :)
But I finally put a good movie on and plopped down in the floor and started painting the words to the fun little song.
Oh yeah and it looks awesome with my new lamps! I love my new lamps, I went to Home Goods for the first time this summer and scored them for an awesome price! 
I am thinking of doing a booth at the First Saturday show at the Chicken Farm Art Center in August, trying to make some extra money and get my 'business' started... I feel like a child with a lemonade stand when I saw my 'business', I have no 'business' I make no money, lol. One day...
Anyways, I really enjoyed making this and thought about doing some smaller ones, that could hang on a wall or sit on a table/dresser with sweet sayings, verses, something...


Tuesday, July 10, 2012

Family Pics

We were lucky enough to win a photo session with Kensie Lee Yarbrough! I absolutely love her! 
She is unbelievably talented and loves what she does. 
I had a whole board on Pinterest for family picture ideas and she had the whole thing printed off when she came to our session and totally listened to my ideas and had her own awesome ideas to incorporate. 
I cannot recommend her enough!
She also did gorgeous maternity and newborn pictures for my sister-in-law... visit her website and use her!


This is my absolute favorite! The boys expressions couldn't have been any better!

Saturday, July 7, 2012

Save the Toms!


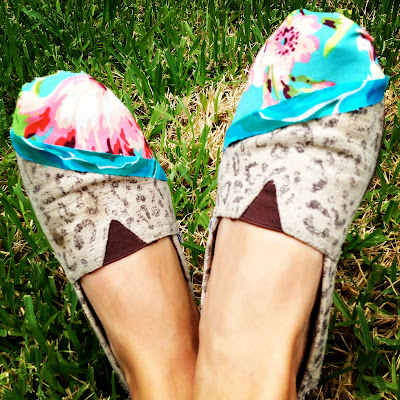
I have a very obvious love for leopard print and Toms...
and I have a very sad story about my very first pair of leopard Toms that I love the most...
they began to fade, got some stains and then one day I looked down and I could see my big pink toenail sticking out :( (Ok it's not that sad of a story, but it is to me)
I was sad but retired them to the top of the closet and for Mothers Day and my birthday got two beautiful new pairs but still missed the originals. Then I remember seeing on a blog somewhere, I think it was Ashley Ann. She put a patch at the toe of her Toms, so I started experimenting.
I used some fantastic Amy Butler fabric, razor blade and a hot glue gun!
This is what I ended up with and it didn't look quite right so I went and grabbed another piece of scrap fabric and perfect...

I am totally in love with them!